As business owners and/or content writers, we all know that writing quality blog posts is an investment in the future. We hope that one day the Google search God(s) will shine upon us and rank our posts, and just as importantly, we hope our content will be appealing to our target audience when posted to social media.
But what we’re really hoping for when we put content out into the world is that it delivers leads and eventually sales for our business.
With that in mind, here’s a technique that will show you how to use Facebook Lead Ads to turn quality content into lead generation opportunities.
Step 1: Select Your Most Valuable Content Piece
Hopefully you already have some content on your website that appeals to your target audience. If not, then write something epic or pay someone to.
One of the most helpful pieces of content for our own target audience here at LeadSync is this guide on how to create a Facebook Lead ad. Which, ironically, you might like to refer to should you decide to give this technique a try.
Got your content sorted? Sweet, let’s move on.
Step 2: Create a Facebook Lead Ad campaign
Here’s the secret sauce: instead of posting a link to your epic content piece as a Facebook post, instead create a Facebook Lead Ad campaign. Instead of linking directly to your blog post (or video, infographic podcast etc), you’re going to use Facebook Lead ads to ask people for their name and email before giving them access to your content.
Yes, it’s a cheeky technique. People could easily find your content if they visited your website. But this is just another way to qualify leads: if they’re interested in your content enough to hand over some basic personal info, then it could be the start of a wonderful (business) relationship.
Also, it’s the same theory as having a landing page that asks for an email address before offering a downloadable ebook, the difference being that the awesome content you’ve created is able to be indexed by search engines.
Let me show you what I mean.
Create your Ad
Here’s an example of one of our ads, promoting our Facebook Lead ad guide:
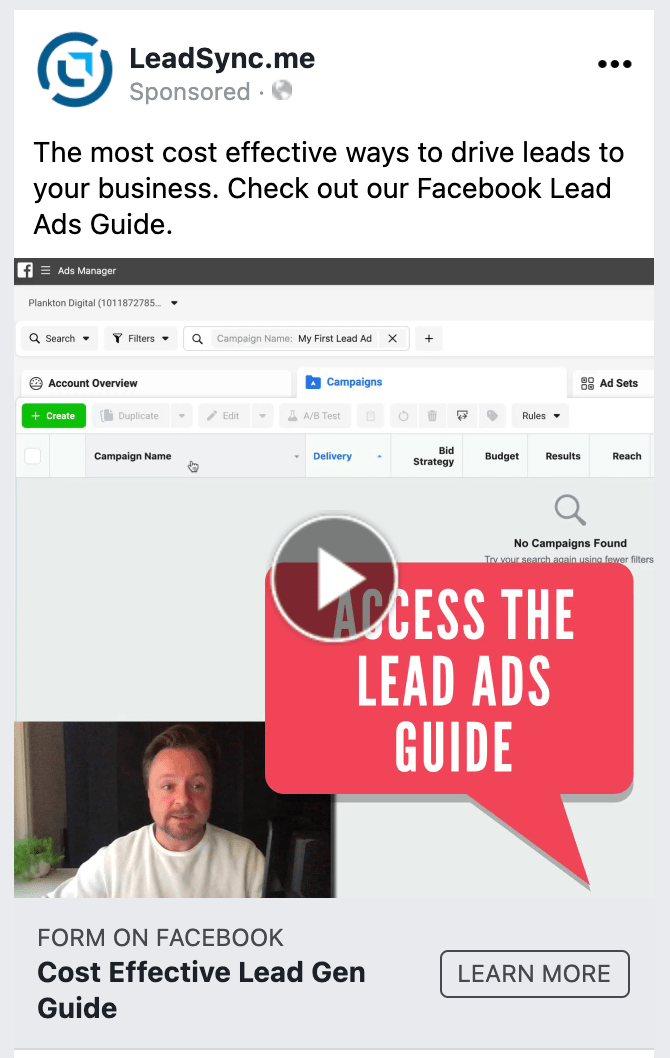
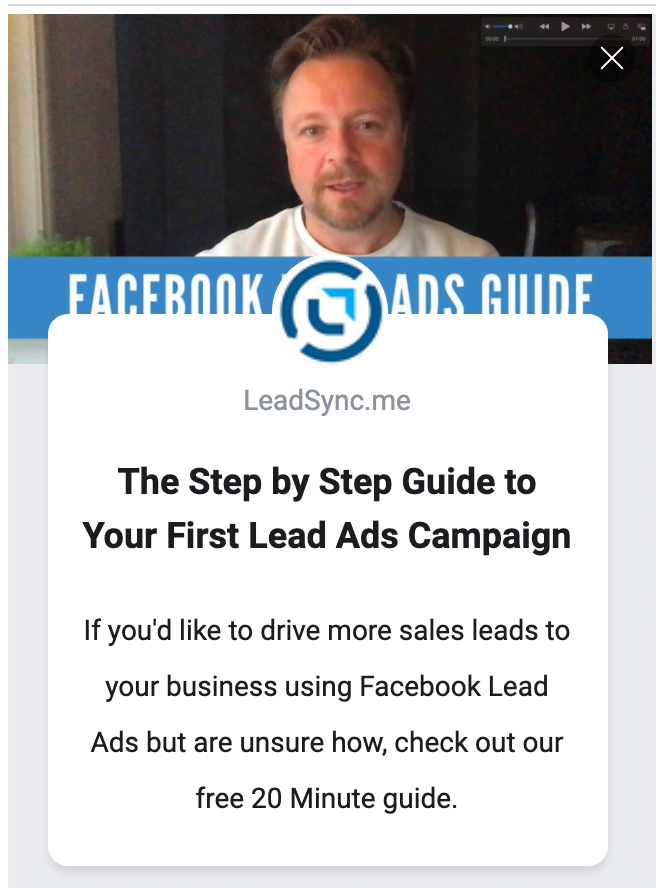
When someone in our Facebook ads target audience clicks on “Learn More”, they see the following introduction:
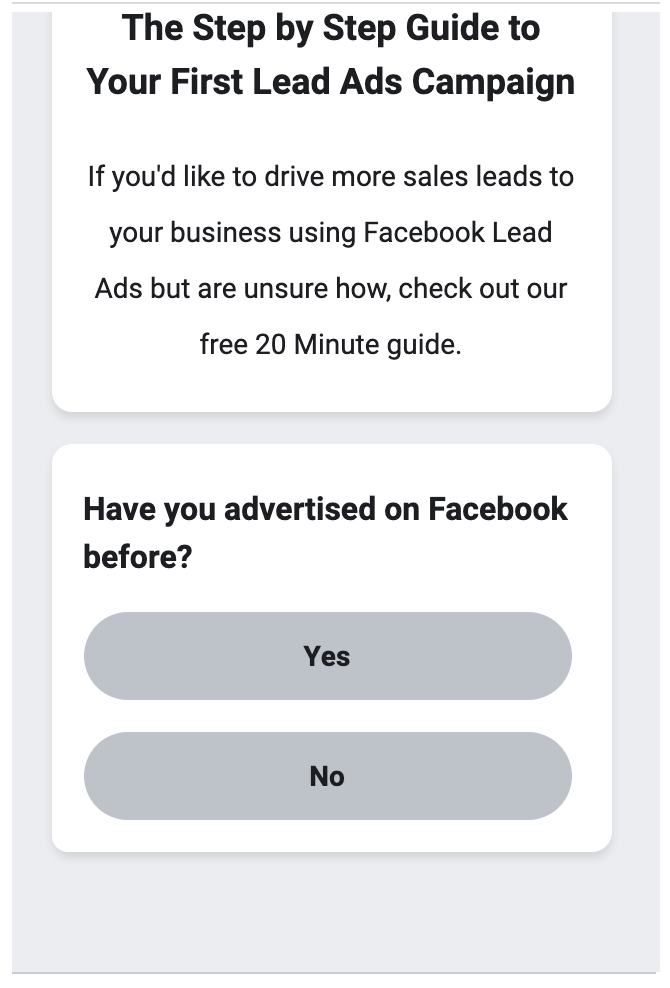
Within the lead form, you can ask qualifying questions. In this case it’s “have you advertised on Facebook before”. We can use this to segment our leads later.
After answering Yes or No, leads are asked for their First Name and Last Name. Keep in mind that these fields get automatically filled with the information from peoples’ Facebook profile, hence the power of Facebook Lead Ads.
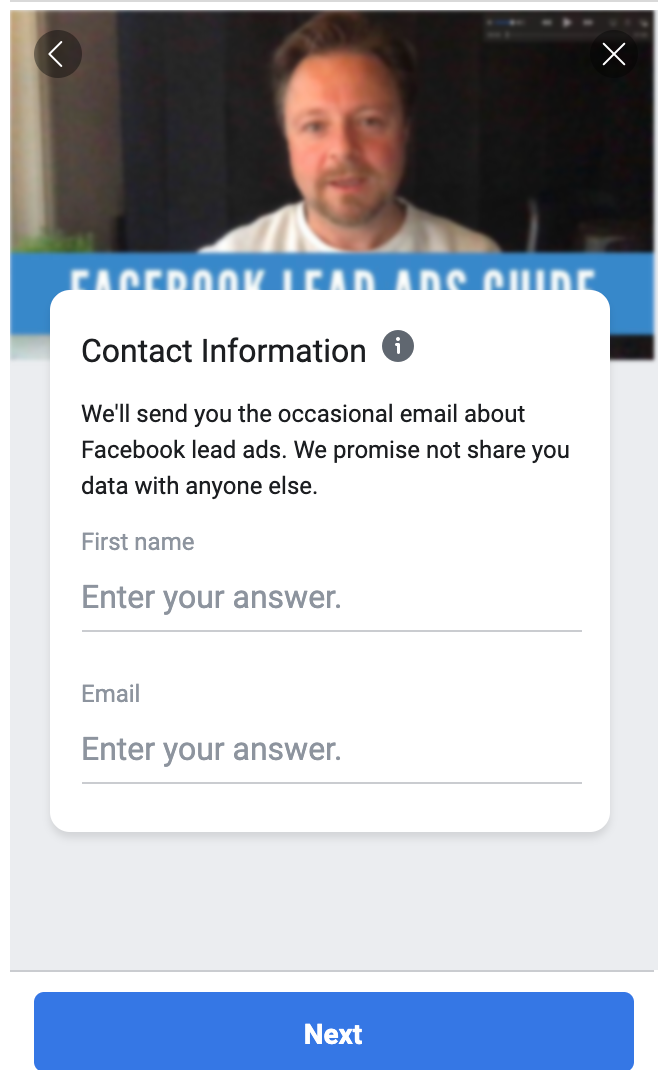
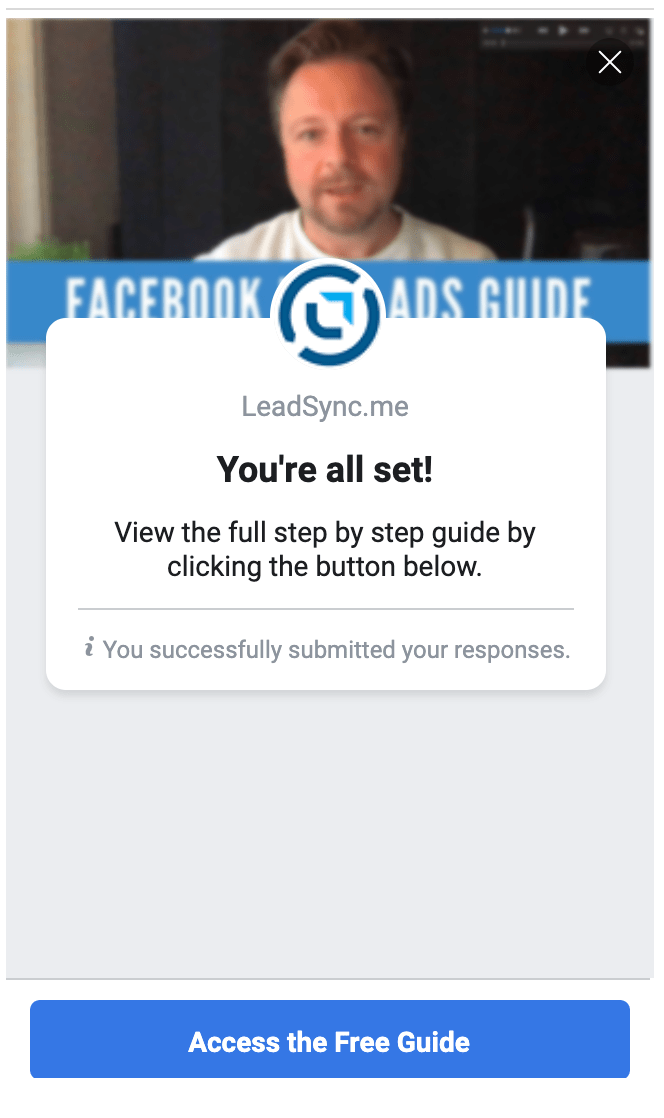
After clicking next and accepting privacy terms and conditions, your lead can now access your content by clicking the button at the bottom of the form.
Step 3: Accessing Leads & Following Up
Now that you’ve collected a lead, where is it and what do you do with it? Here are some options:
- You can simply download leads as a CSV from Facebook Ads Manager.
- Add leads to your CRM using LeadSync.me
- Add your leads to automated email workflow, using Mailchimp or your favourite email marketing platform.
Step 4: Test Ads and Content
Finally, keep testing your ad copy and content to optimise the Cost Per Lead for your campaigns.
Luke is the founder of LeadSync and, as a Digital Marketer, has been helping businesses run lead generation campaigns since 2016.

